123.hp.com/setup 2524
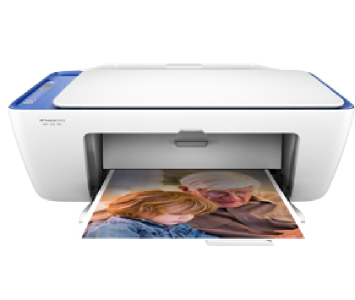
The Deskjet 2524 is small in size and cost. This printer is the ideal companion for your printing needs if you need a printer only for printing and not any other functions like faxing, scanning, etc. It’s not Wireless enabled and the software drivers should either be installed from the Installation CD or downloaded from 123.hp.com/setup 2524 or 123.hp.com/dj2524. Note that HP doesn’t provide a USB cable along with the printer.

Given below are some of the features of the Deskjet 2524
- Print speed (B/W): 6 ppm
- Print speed (colour): 4 ppm
- Duty Cycle: 750 pages per month
- Paper Input Tray capacity: 50 sheets
- Paper Output Tray capacity: 30 sheets
- Connectivity: USB 2.0 (cable must be bought separately)
123.hp.com/dj2524 Printer Setup
HP Deskjet 2524 Printer Unboxing
- First, open the printer box and keep aside the installation cartridges, CD and power module.
- You can also use the installation CD to install the software drivers on both Windows and Mac. To download the updated software drivers,simply go to 123.hp.com/setup 2524 or 123.hp.com/dj2524.
- Then, remove the cardboard piece on top of the printer.
- Next, remove the printer from the cardboard box using the handles on the on the printer bag.
- Now, keep aside the Installation guide and the Getting Started guide.
- Then, remove the caps on either side of the printer and remove the printer from the printer bag.
- Also, peel away the blue tapes from the surface of the printer.
- Lower the Output Tray and the ink cartridge access door.
- Then, remove the packaging material and close both the ink cartridge access area and the Output Tray.
- Finally, Lift the Paper Input Tray and check for packaging materials.
HP Deskjet 2524 Printer Ink cartridge Installation
First, connect the printer to the power source and switch it on to install the cartridges. Follow the steps below to switch on your printer and install ink cartridges.
- Take the power module that you kept aside earlier and connect one end of the power cord into the slot of the power module.
- Now, turn the printer backwards and connect one end of the power cord into the power slot beside the USB slot and the other end into the wall outlet.
- Then, switch on the printer and open the ink cartridge access door that is behind the Paper Output Tray.
Follow the steps given below to install ink cartridges.
- Once you’ve opened the ink cartridge access door, wait for the ink carriage to reach the center.
- Take one of the tri-colour cartridge that you kept aside earlier and unwrap it.
- Remove the transparent film on the copper coloured contacts and insert the cartridge at a slightly upward angle into the left slot until it snaps into place.
In the next section, you’ll learn how to load unused paper into the printer. The software driver downloaded from 123.hp.com/setup 2524 will continue installing the required files only if you’ve installed ink cartridges and loaded unused paper.
123 HP Deskjet 2524 Loading Unused paper
- Before loading paper into the Input Tray, slide the paper width guide to the extreme end of the printer.
- Align a stack of plain white paper and also insert the stack of paper into the Paper Tray.
- Adjust the paper width guide such that it touches the edge of the paper.
- Once you have loaded paper into the Input Tray, you can also download and install the software from 123.hp.com/setup 2524.
123.hp.com/dj2524 Software Driver Installation
- Before you start the installation, make sure you have a USB cable less than 9ft 10 in (3 m) length.
- Make sure that your printer and computer are both switched on and active.
- Don’t connect your USB to the computer unless asked to.
- From the Devices and Printers windows, remove your printer from the list by right clicking the name of the printer and selecting Remove Device.
- Now, open a browser of your choice on your computer and go to 123.hp.com/setup 2524.
- Click the Download button and wait for the HP Easy Start Utility to finish downloading.
- Open the HP Easy Start Utility and follow the instructions on the screen to install the software.
- Connect the USB cable to the computer when prompted by the HP Easy Start Software.

This completes the download and installation of software driver from 123.hp.com/setup 2524. The software drivers can also be downloaded from 123.hp.com/dj2524.
123 HP Deskjet 2524 Duplex Printing
- First, check if there are enough sheets in the Paper Tray to get the job done.
- Open the document that has to be printed and click File.
- Then click Print.
- Select Printer Properties/Preferences/Printer Setup.
- Select the Print on Both sides option from the Printer shortcuts option. In case there’s no shortcut menu select the Print on both sides from the Layouts or features option.
- Select the binding or flip option.
- Once the printer has finished printing, take out the stack of papers from the output tray and align the stack of papers on a hard surface.
- Insert the stack of papers print side down into the Input tray.
- Click Continue and wait for the rest of the pages to print.
123 HP Deskjet 2524 Printer Offline
If a Printer Offline (windows) message is displayed, the conventional methods of clearing the print queue and cancelling print jobs won’t work. Follow the steps below to fix the issue.
- Download HP Print and Scan Doctor and run it. From the Start menu, select your printer. Follow the instructions in case you have a connection problem.
- Now, Reset your printer.
- Then, check if your HP Deskjet 2524 is set as the default printer.
- Next, update the printer software.
- Check if you have correctly downloaded and installed the software from 123.hp.com/setup 2524 .
- Finally, re-install the software drivers from 123.hp.com/setup 2524 .
123.hp.com/setup 2524 – Ink cartridge issues
If you haven’t installed the ink cartridges properly, follow the steps given below to re-install them.
- Turn on your HP Deskjet 2524 and open the ink cartridge access area.
- Wait for the ink cartridge slot to reach the center.
- Slightly push down on the ink cartridge to remove it.
- Remove the cartridge and check if the copper coloured contacts have any transparent film sticking to them.
- If there is some transparent film sticking to the contacts, remove it gently without touching the copper coloured contacts.
- Now, Re-install the ink cartridges into the ink cartridge slot at a slightly upward angle.
- If the problem continues, then remove the cartridge and clean the copper coloured contacts with a lint-free cloth or swab. Place the ink cartridge back into its slot and try printing again.
- Replace the ink cartridges and try printing again.
- If the problems continue, call us to resolve your HP Deskjet 2524 issues.
Disclaimer:
We are independent service providers who offer guidance and assistance for downloading & installing software drivers from 123.hp.com/setup 2524 or 123.hp.com/dj2524 and resolving your printer related issues and queries. We are not specifically tied-up with HP and its services nor do we trade its product or services. All of the images and content on this website are intended purely for informational purposes alone. For issues related to service and warranty, contact the manufacturer directly and examine our privacy policy.
